Rollo Thermal Printer Not Printing? (Quick Fixes)

If your Rollo thermal printer powers on (glowing green light) but doesn’t print, don’t worry. With officially tested steps, this guide clearly breaks down the root causes and solutions for the Rollo thermal printer not printing.
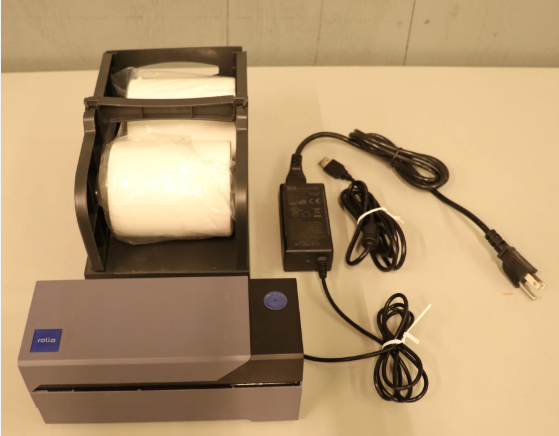
Whether you’re a small business owner or shipping from home, Rollo thermal printers are powerful tools once set up correctly. They use direct thermal technology, meaning they don’t require ink or toner.
I currently run a cozy home-based candle shop and ship out handcrafted orders every day. My Rollo printer has always been on my back. But one day, it betrayed me. The orders were packed and ready, but when I hit Print, nothing happened. As a new Rollo user, I know you might be facing this, too, at some point. In this blog, I will guide you through exactly what I did to fix the printing issue and what you can do, too.
Solution 1: Check the Basic Connection
Before jumping into ‘Rollo thermal printer not printing’ advanced fixes, confirm the essentials:
- If your printer does not flash a steady green light, then disconnect the power cord, wait for 30 seconds, and plug it back in. Make sure that the power source is stable before turning it back on.
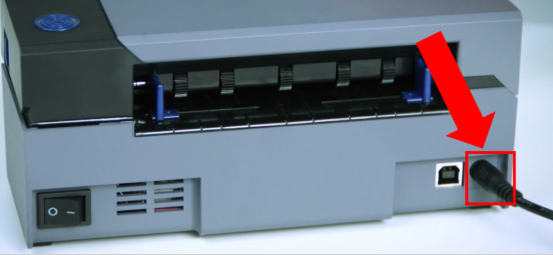
- Make sure all cables are secure, especially if you’re using USB.
- If using Wi-Fi (Rollo X1040 model), confirm the blue LED is solid, indicating a stable wireless connection.
A loose cable or low voltage from a faulty adapter can prevent the printer from functioning properly.
Solution 2: USB Port Shuffle
- When you plug your printer into a different USB port, Windows might treat it as a new device, often with a label like Copy 1 or Copy 2 in the printer settings.
- Print jobs sent to the old version won’t go anywhere.
- Make sure your printer and your computer are on the same Wi-Fi network.
- If the Wi-Fi is blinking, the printer is not connected.
- Restart your router and printer, and reconnect using the Rollo setup guide.
Solution 3: Verify Printer Driver and Settings
- First, you need to open your web browser and type support.rollo.com.
- After that, identify your Rollo printer model.
- Now, download the latest driver and software package for your device, either Windows or Mac.
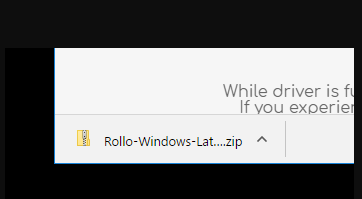
- If it’s a zip file, extract the file that you have downloaded.
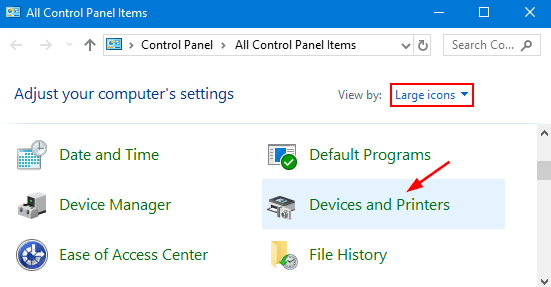
- Next, reach out to the Control Panel.
- Simply go to the Devices and Printers section on your device. If the printer is listed, the driver is likely installed correctly.
- Then, right-click on your printer and select Printing Preferences.

- In the last step, click the Advanced tab.
Note: Ensure the driver is listed as Rollo Printer, not Microsoft IPP Class Driver or Generic Thermal Printer.
Solution 4: Adjust Print Darkness or Density
If the printer responds, but the output is faint or missing:
- From the Printer Preferences, go to Advanced.
- Then, select Darkness or Print Density.
- Reduce or increase the print density until the labels look sharp.
Too much heat may burn labels and cause them to stick, while too little heat results in faint prints.
Solution 5: Clean the Print Head and Sensors
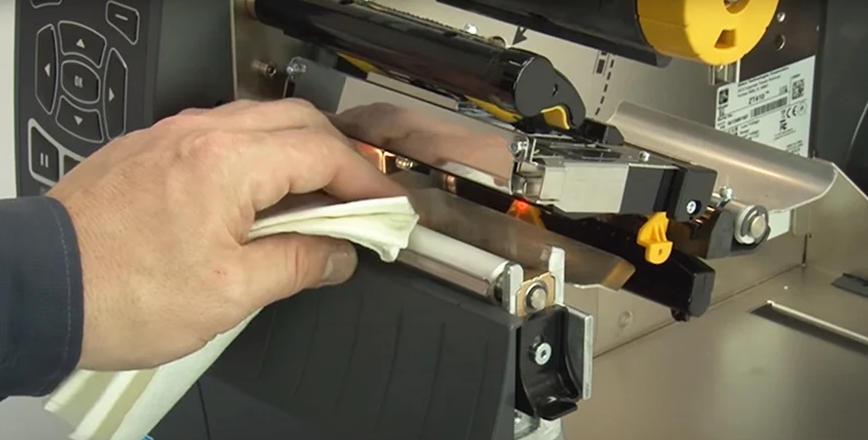
Dust or residue on labels may affect printing. Clean carefully by following these steps:
- First, turn off the Rollo printer and unplug it.
- After that, open the printer cover and locate the print head.
- Use a soft cloth lightly moistened with isopropyl alcohol (99%) to clean the print head gently.
- Allow your print head to dry completely before turning the printer back on.
Important Note: Avoid scraping or using water; it could damage internal components.
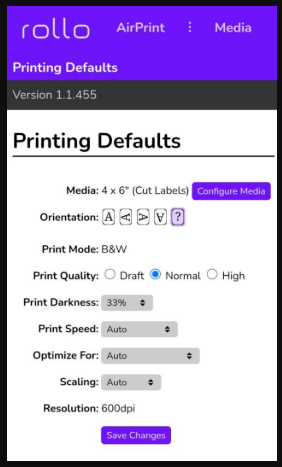
Solution 6: Check Label Size & Orientation Settings
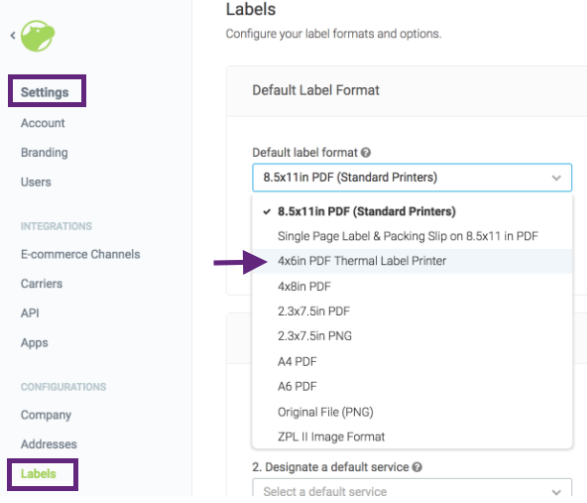
- Incorrect label size or rotation settings can cause printing issues or blank outputs.
- Set the correct label size (e.g., 4″ x 6″, 2″ x 1″) using Rollo’s software or your shipping platform.
- Double-check that the orientation is set to Portrait (not landscape) to avoid cut-offs.
Solution 7: Run Auto Calibration
If your “Rollo thermal printer not printing“ clearly or is feeding labels incorrectly, recalibrate:
- First, turn on your Rollo thermal printer.
- Now, press and hold the top button until it beeps twice.
- It will feed a few labels and adjust its internal sensor settings.
- Ensure you’re using direct thermal labels (scratch-sensitive). Labels meant for inkjet or laser printers won’t work.
How to Print a Test Page (Mini Diagnostic Step)
Printing a test page helps confirm whether the issue is with your Rollo printer, the connected computer, or the software.
The basic steps to perform a print test on Windows are as follows:
- Go to the Control Panel and then simply click on Devices and Printers.
- Right-click on the printer and select the Printing Properties option.
- Clickthe Print Test page.
If the test page prints fine, the problem lies in the software or label settings, not the printer..


Comments
Post a Comment